I recently undertook round two of our Wedding Invite Photo Shoot. Although round one was pretty successful, trying again has been on my to-do list for awhile. I'm still not sure exactly how these images will work into the final product of our save-the-dates and wedding invites, but they're nice to have around just in case. I'm definitely excited about the possibilities.
It took me so long to get around to round two because I was so happy with what I conceived for round one that I was unsure if I could come up with any new ideas. The process of round two seemed to go better than the first. The first time I relied heavily on my iPhone and Hipstamatic app to produce cool images. This time around it was all me. I set the camera to manual focus and took a lot of time getting things positioned to exactly where I wanted them to be. Those are the good things that happened.
I thought the shoot was a success until I uploaded the photos and saw what I came up with on the big screen. The lighting seemed wrong. I didn't diffuse any of the lights pointed at the set because, to my eye, it looked soft. But the hard copy proved otherwise. The light was harsh and all of the wood tones in the props had orangey glow. Maybe I should have reduced the number of lights. Maybe I should have turned off all the overhead lights in the room to control the ambient light bouncing off surfaces. Maybe I should have diffused the light. I don't know. Additionally, John's ring was so shiny that it was difficult to find photos without my reflection, something I hadn't contemplated when shooting. I also could have used a tripod, something I don't currently own. Trial and error.
I'm happy with the images that I eventually got but - a lot of the originals were unusable. And the ones that survived required more editing than I'm comfortable with. Live and learn, I guess. I'll have to do more research, keep trying to figure out that dang lighting.
View the full set on my Flickr. Additional photos from the shoot after the jump.
Showing posts with label lighting. Show all posts
Showing posts with label lighting. Show all posts
10.14.2011


6.15.2011
I Do
Wedding Stationary Photoshoot, attempt number one.
I'm bound and determined to make my own wedding stationary for our upcoming nuptials. It's not because I'm cheap, although that part is pretty persuasive ($800 for 100 invites? I don't think so). I'm embarking on this project for two reasons: first, it will give me a chance to experiment with new techniques and figuring out how to do lighting and secondly, I honestly don't think that anyone can carryout my vision as well as I can.
Let's start with the latter. After spending the last six or seven months receiving wedding magazines, wedding junk mail, wedding spam, and other litter courtesy of the wedding industrial complex, I really feel like, more than anything else, mass produced invites are impersonal. Sure, you can get super fancy ones but they also have a super fancy price. I would rather personally carry out my vision than try to communicate it to someone else and run the risk of being disappointed. This way, the only person I can be upset with is myself if something doesn't go as planned. And not to brag, but I'm typically a genius at making things work.
My Christmas Card Photo Shoot was a dry run for what I wanted our invites to look like. Simple, meaningful, gorgeous lighting. John and I met because of our mutual love of Scrabble, so I knew that our wedding stationary had to incorporate that in some way. I've uploaded three other decent photos to Flickr that may or may not be used in save the dates, invites, wedding programs, etc.
As far as the former goal with this project (learning new techniques and lighting), I have to say that I failed miserably on my first attempt. I did the shoot in about an hour (actually while John and I were waiting for Obama to tell us why he was interrupting Celebrity Apprentice) with similar lighting to the set up I used for my Engagement Ring Photo Shoot. I was basically just dinking around, to be perfectly honest. I have no formal training; I read half an article on the Internet about lighting, thought it sounded like it would work, and set to it. I used a few lamps I had laying around the apartment and some tracing paper, again, not interested in investing any money into making this work. I also used the ambient light in our apartment, which comes from hanging track lighting bouncing off brick walls, giving it an orangey color. With little idea as to what I was doing, I pretty much stood there for an hour rearranging lights, watching how light hit what I was trying to capture, swatting away the occasional cat, rinse and repeat.
I say that I failed in my first goal because the only photos I ended up liking were taken with the Hipstamatic app on my iPhone. This accomplishes goal number two in that it achieves the look I want, but it fails at goal number one as I feel like the Hipstamatic is doing all the work in this situation, not me. Anyone can use a cool app or do a cool effect in Photoshop. How do I achieve the look I want in the field with my dSLR? That's what I need to be working toward and hopefully in accomplishing that goal, I can further refine the look that I want.
More to come. For now, check out the rest of the set.

I'm bound and determined to make my own wedding stationary for our upcoming nuptials. It's not because I'm cheap, although that part is pretty persuasive ($800 for 100 invites? I don't think so). I'm embarking on this project for two reasons: first, it will give me a chance to experiment with new techniques and figuring out how to do lighting and secondly, I honestly don't think that anyone can carryout my vision as well as I can.
Let's start with the latter. After spending the last six or seven months receiving wedding magazines, wedding junk mail, wedding spam, and other litter courtesy of the wedding industrial complex, I really feel like, more than anything else, mass produced invites are impersonal. Sure, you can get super fancy ones but they also have a super fancy price. I would rather personally carry out my vision than try to communicate it to someone else and run the risk of being disappointed. This way, the only person I can be upset with is myself if something doesn't go as planned. And not to brag, but I'm typically a genius at making things work.
My Christmas Card Photo Shoot was a dry run for what I wanted our invites to look like. Simple, meaningful, gorgeous lighting. John and I met because of our mutual love of Scrabble, so I knew that our wedding stationary had to incorporate that in some way. I've uploaded three other decent photos to Flickr that may or may not be used in save the dates, invites, wedding programs, etc.
As far as the former goal with this project (learning new techniques and lighting), I have to say that I failed miserably on my first attempt. I did the shoot in about an hour (actually while John and I were waiting for Obama to tell us why he was interrupting Celebrity Apprentice) with similar lighting to the set up I used for my Engagement Ring Photo Shoot. I was basically just dinking around, to be perfectly honest. I have no formal training; I read half an article on the Internet about lighting, thought it sounded like it would work, and set to it. I used a few lamps I had laying around the apartment and some tracing paper, again, not interested in investing any money into making this work. I also used the ambient light in our apartment, which comes from hanging track lighting bouncing off brick walls, giving it an orangey color. With little idea as to what I was doing, I pretty much stood there for an hour rearranging lights, watching how light hit what I was trying to capture, swatting away the occasional cat, rinse and repeat.
I say that I failed in my first goal because the only photos I ended up liking were taken with the Hipstamatic app on my iPhone. This accomplishes goal number two in that it achieves the look I want, but it fails at goal number one as I feel like the Hipstamatic is doing all the work in this situation, not me. Anyone can use a cool app or do a cool effect in Photoshop. How do I achieve the look I want in the field with my dSLR? That's what I need to be working toward and hopefully in accomplishing that goal, I can further refine the look that I want.
More to come. For now, check out the rest of the set.
1.09.2011
Engagement Ring Photo Shoot

Jewelry is notoriously difficult to photograph without the right lighting and equipment. One of my first assignments as a reporter was to cover the reopening of a jewelry store in town, and I had a lot of trouble trying to capture the jeweler's designs. So I knew going in that trying to take a decent photo was going to be a difficult task.
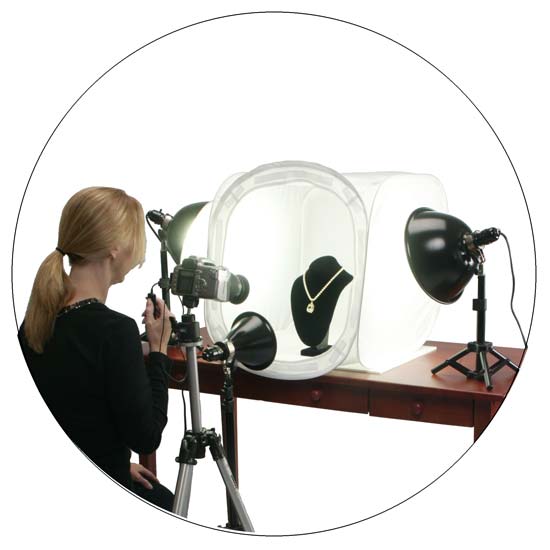
I did some reading on the good ol' Internet and tried to copy this design using the materials I had on hand, which included my Canon (regular ol' lens), a clip-on desk lamp, a clip-on work light, a ring box, a wine glass, a cheap tripod and some tracing paper. I only had enough lights to do a light on one side of the ring, which I taped tracing paper to in an effort to diffuse the light. The other clip light I positioned below and aimed directly into the diamond to try and catch that sparkle.
The next hour and a half was trial and error over and over again, adjusting the light, adjusting the camera, adjusting the settings on the camera, moving the ring, moving the light, moving things just a fraction of an inch, having a cat sit on my whole set up. It was frustrating, but out of the 150 photos I took, I wound up with four good ones. Doesn't it always go that way?
The very last photo I took, which I posted above, was taken at last second with my iPhone 4 and then converted to black and white. I also edited out some minuscule hairs and dust on the ring box. I thought that turned out to be the best of the lot, and I am equal parts pissed and pleased about that.
Overall I think I did a pretty bang up job. :) It's a goal of mine to learn more about lighting in the next year or so, and how to illuminate things, and how to control where light hits things. I can already see it's going to take a lot of patience.
More photos of the ring after the jump.
Subscribe to:
Posts (Atom)